这里我们Host选择使用单节点All-in-One安装模式,可以零配置快速部署 KubeSphere和Kubernetes。我们安装联邦集群需要有一台节点进行管理。
Member需要在Kubernetes中安装Kubesphere当作Member节点,这里我使用Kubesphere
3.3版本,Kubernetes1.24进行部署测试
多集群联邦架构图如下

服务器最小配置
| 支持操作系统 | 最低配置 |
|---|---|
| Ubuntu | 16.04, 18.04, 20.04, 22.04 2 核 CPU,4 GB 内存,40 GB 磁盘空间 |
| Debian Buster | Stretch 2 核 CPU,4 GB 内存,40 GB 磁盘空间 |
| CentOS 7.x | 2 核 CPU,4 GB 内存,40 GB 磁盘空间 |
| Red Hat Enterprise Linux 7 | 2 核 CPU,4 GB 内存,40 GB 磁盘空间 |
| SUSE Linux Enterprise Server 15/openSUSE Leap 15.2 | 2 核 CPU,4 GB 内存,40 GB 磁盘空间 |
依赖项要求
KubeKey 可以将 Kubernetes 和 KubeSphere 一同安装。针对不同的 Kubernetes 版本,需要安装的依赖项可能有所不同。您可以参考以下列表,查看是否需要提前在节点上安装相关的依赖项。
| 依赖项 | Kubernetes 版本 ≥ 1.18 | Kubernetes 版本 < 1.18 |
|---|---|---|
| socat | 必须 | 可选但建议 |
| conntrack | 必须 | 可选但建议 |
| ebtables | 可选但建议 | 可选但建议 |
| ipset | 可选但建议 | 可选但建议 |
使用脚本一键部署Kubesphere
安装依赖
yum install -y socat ipset ipvsadm conntrack-tools

#docker可选项,可以不安装或者自行安装,我这里就跳过docker安装的步骤了
当依赖安装完毕,我们就可以下载脚本
mkdir /root/ks && cd /root/ks
export KKZONE=cn
curl -sfL https://get-kk.kubesphere.io | VERSION=v3.0.7 sh -
下载完脚本进行执行脚本,我这里只部署一台host节点,不运行容器,通过接入的方式管理其它Kubernetes
chmod +x kk执行脚本,创建cluster集群
[root@ops ks]# ./kk create cluster --with-kubernetes v1.22.12 --with-kubesphere v3.3.2
#这里直接执行即可

 _   __      _          _   __
| | / /     | |        | | / /
| |/ / _   _| |__   ___| |/ /  ___ _   _
|    \| | | | '_ \ / _ \    \ / _ \ | | |
| |\  \ |_| | |_) |  __/ |\  \  __/ |_| |
\_| \_/\__,_|_.__/ \___\_| \_/\___|\__, |
                                    __/ |
                                   |___/

21:37:55 CST [GreetingsModule] Greetings
21:37:55 CST message: [ops]
Greetings, KubeKey!
21:37:55 CST success: [ops]
21:37:55 CST [NodePreCheckModule] A pre-check on nodes
21:37:56 CST success: [ops]
21:37:56 CST [ConfirmModule] Display confirmation form
+------+------+------+---------+----------+-------+-------+---------+-----------+--------+---------+------------+------------+-------------+------------------+--------------+
| name | sudo | curl | openssl | ebtables | socat | ipset | ipvsadm | conntrack | chrony | docker  | containerd | nfs client | ceph client | glusterfs client | time         |
+------+------+------+---------+----------+-------+-------+---------+-----------+--------+---------+------------+------------+-------------+------------------+--------------+
| ops  | y    | y    | y       | y        | y     | y     | y       | y         | y      | 20.10.8 | v1.4.9     | y          |             |                  | CST 21:37:56 |
+------+------+------+---------+----------+-------+-------+---------+-----------+--------+---------+------------+------------+-------------+------------------+--------------+

#前面几个为必选项,如果不安装脚本会有提示,我这里都安装过了
当打印完配置后,我们继续下一步 输入yes
Continue this installation? [yes/no]: yes
...
clusterrolebinding.rbac.authorization.k8s.io/ks-installer unchanged
deployment.apps/ks-installer unchanged
clusterconfiguration.installer.kubesphere.io/ks-installer configured
21:40:02 CST success: [ops]
#####################################################
###              Welcome to KubeSphere!           ###
#####################################################
这下面就是我们的Kubesphere 信息
Console: http://192.168.31.101:30880
Account: admin
Password: P@88w0rd
NOTES:
  1. After you log into the console, please check the
     monitoring status of service components in
     "Cluster Management". If any service is not
     ready, please wait patiently until all components
     are up and running.
  2. Please change the default password after login.

#####################################################
https://kubesphere.io             2023-04-10 21:52:38
#####################################################
21:52:41 CST success: [ops]
21:52:41 CST Pipeline[CreateClusterPipeline] execute successfully
Installation is complete.

Please check the result using the command:

        kubectl logs -n kubesphere-system $(kubectl get pod -n kubesphere-system -l 'app in (ks-install, ks-installer)' -o jsonpath='{.items[0].metadata.name}') -f
安装过程中可能会因网络或者其它问题导致服务异常,这个我们重复执行脚本即可!
设置Kubesphere 多集群联邦
首先登录平台
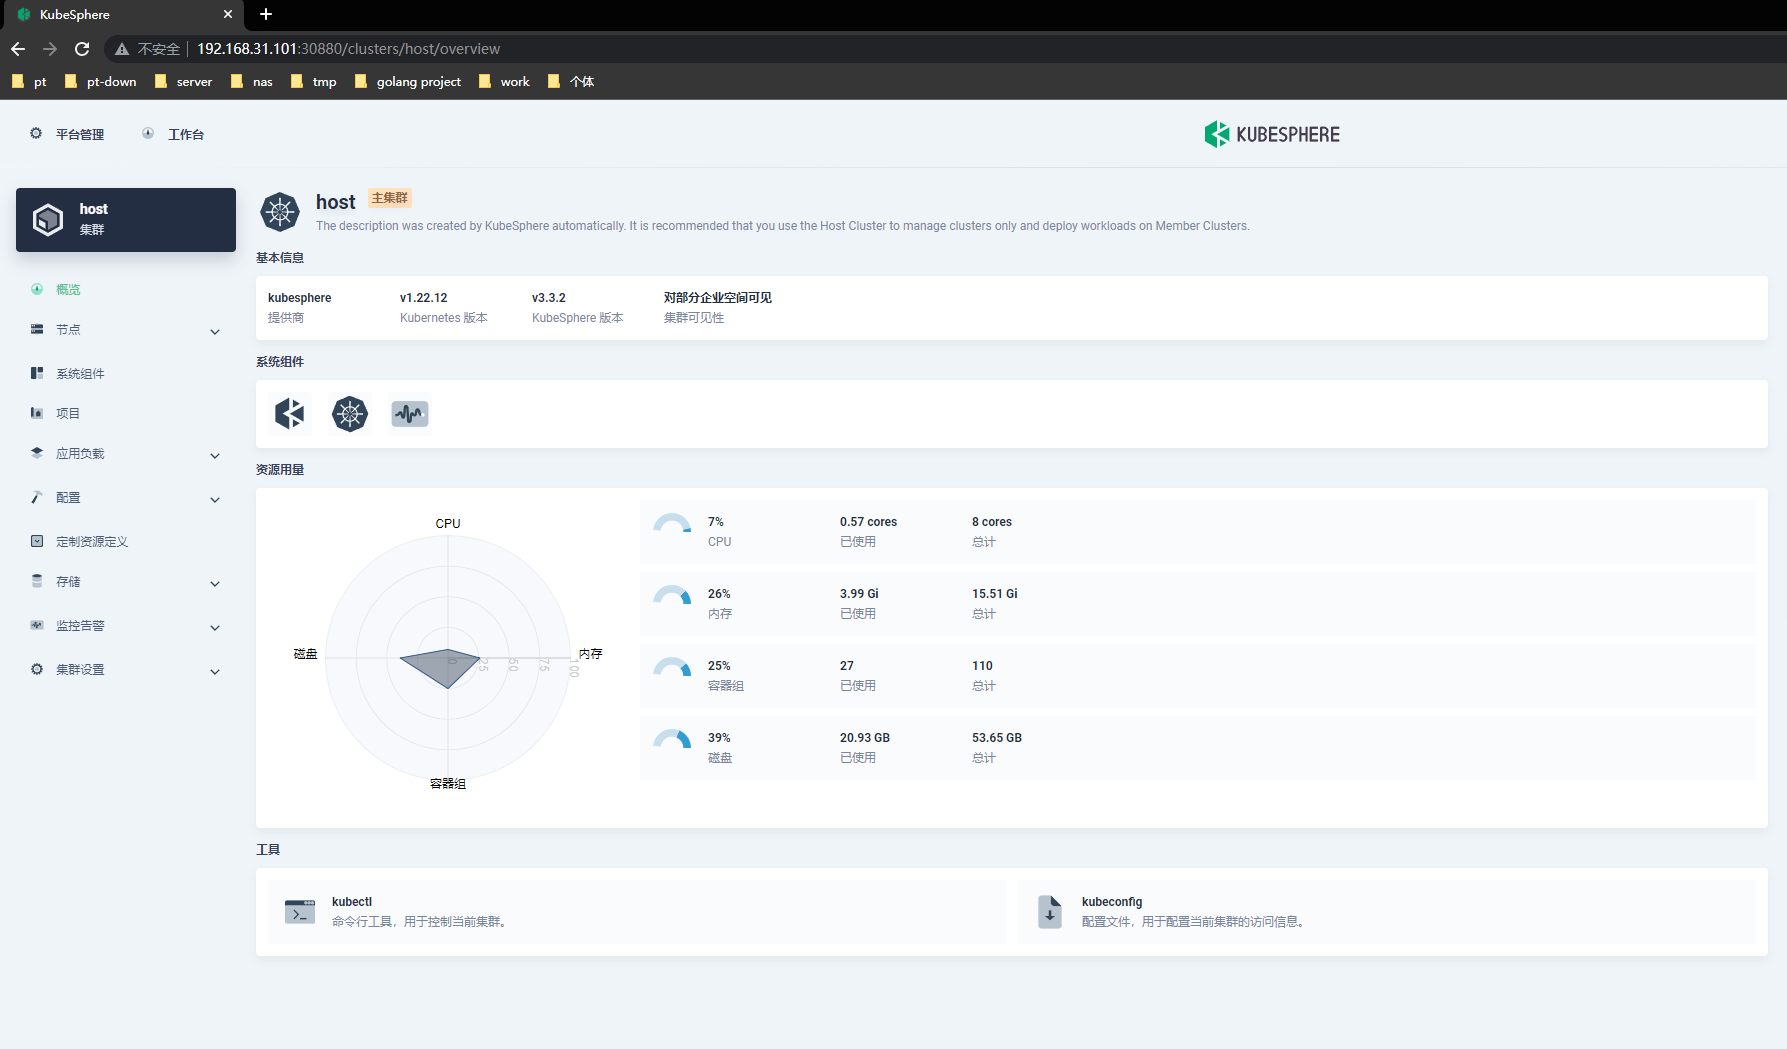
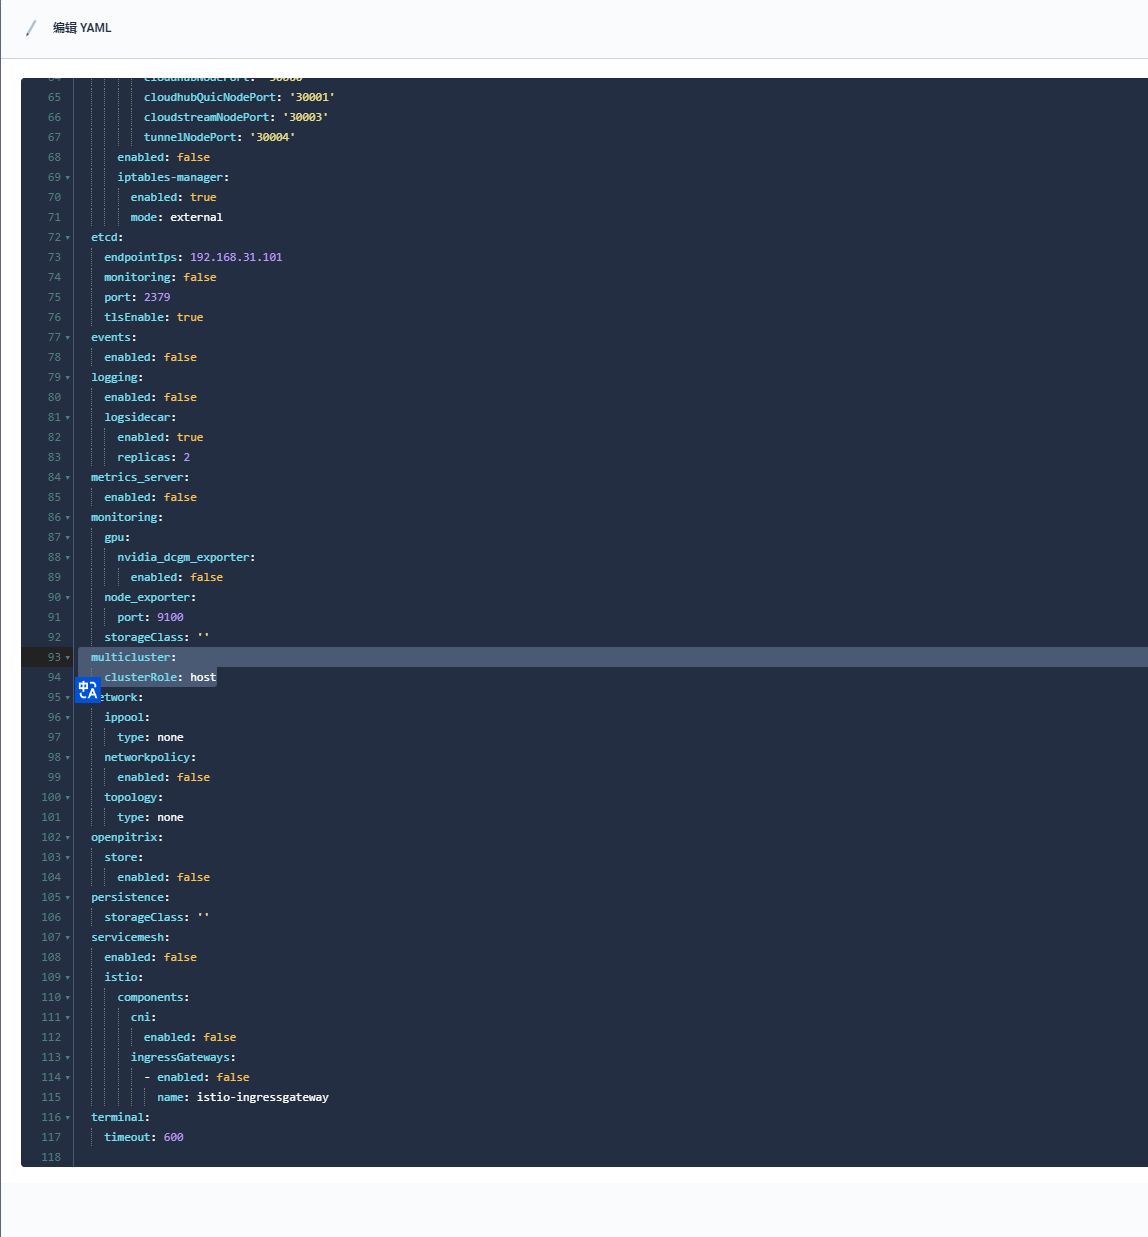
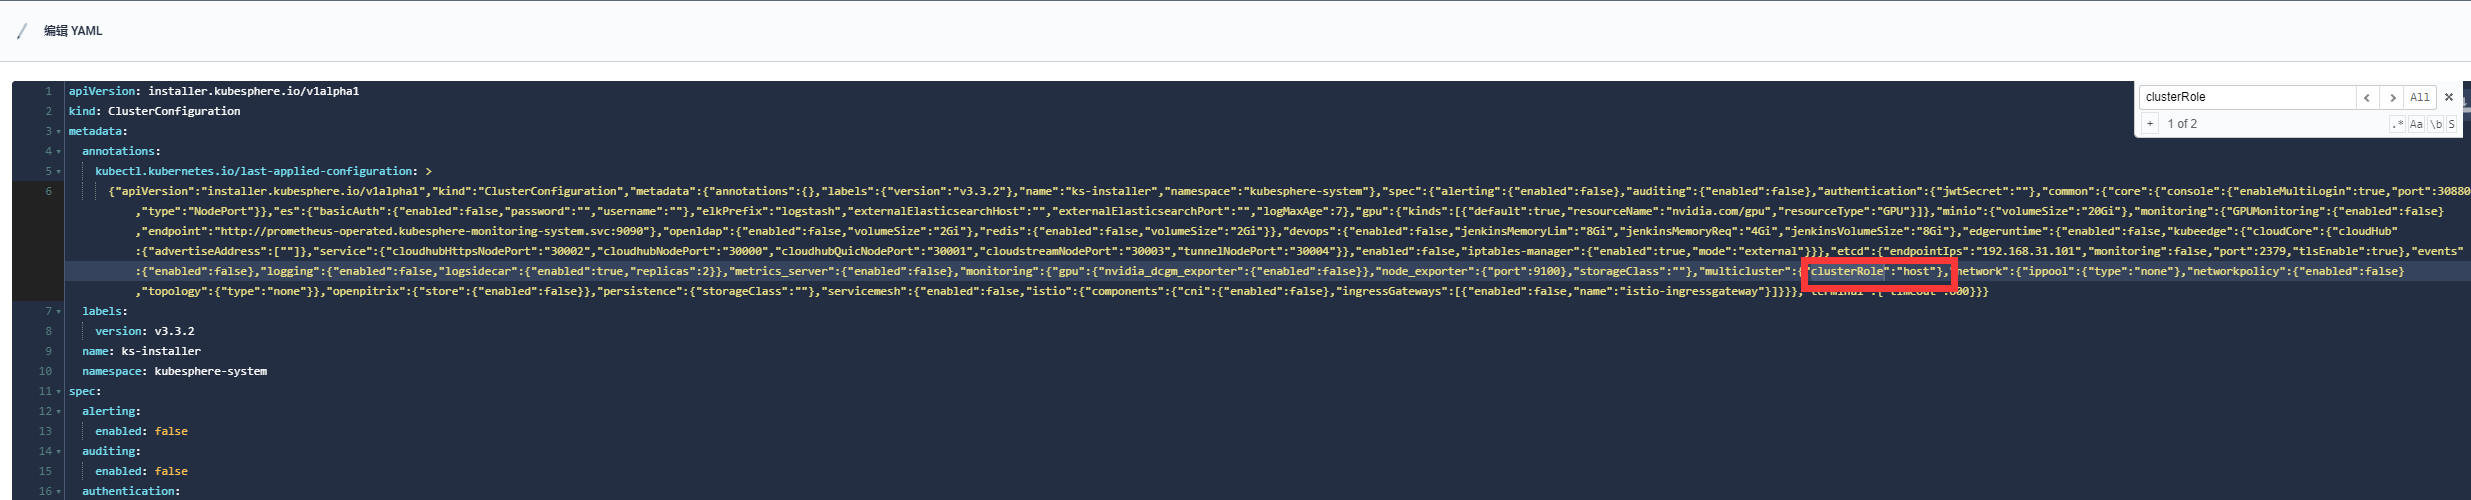
接下来我们修改Kubesphere中的crd资源
找到ClusterConfiguration
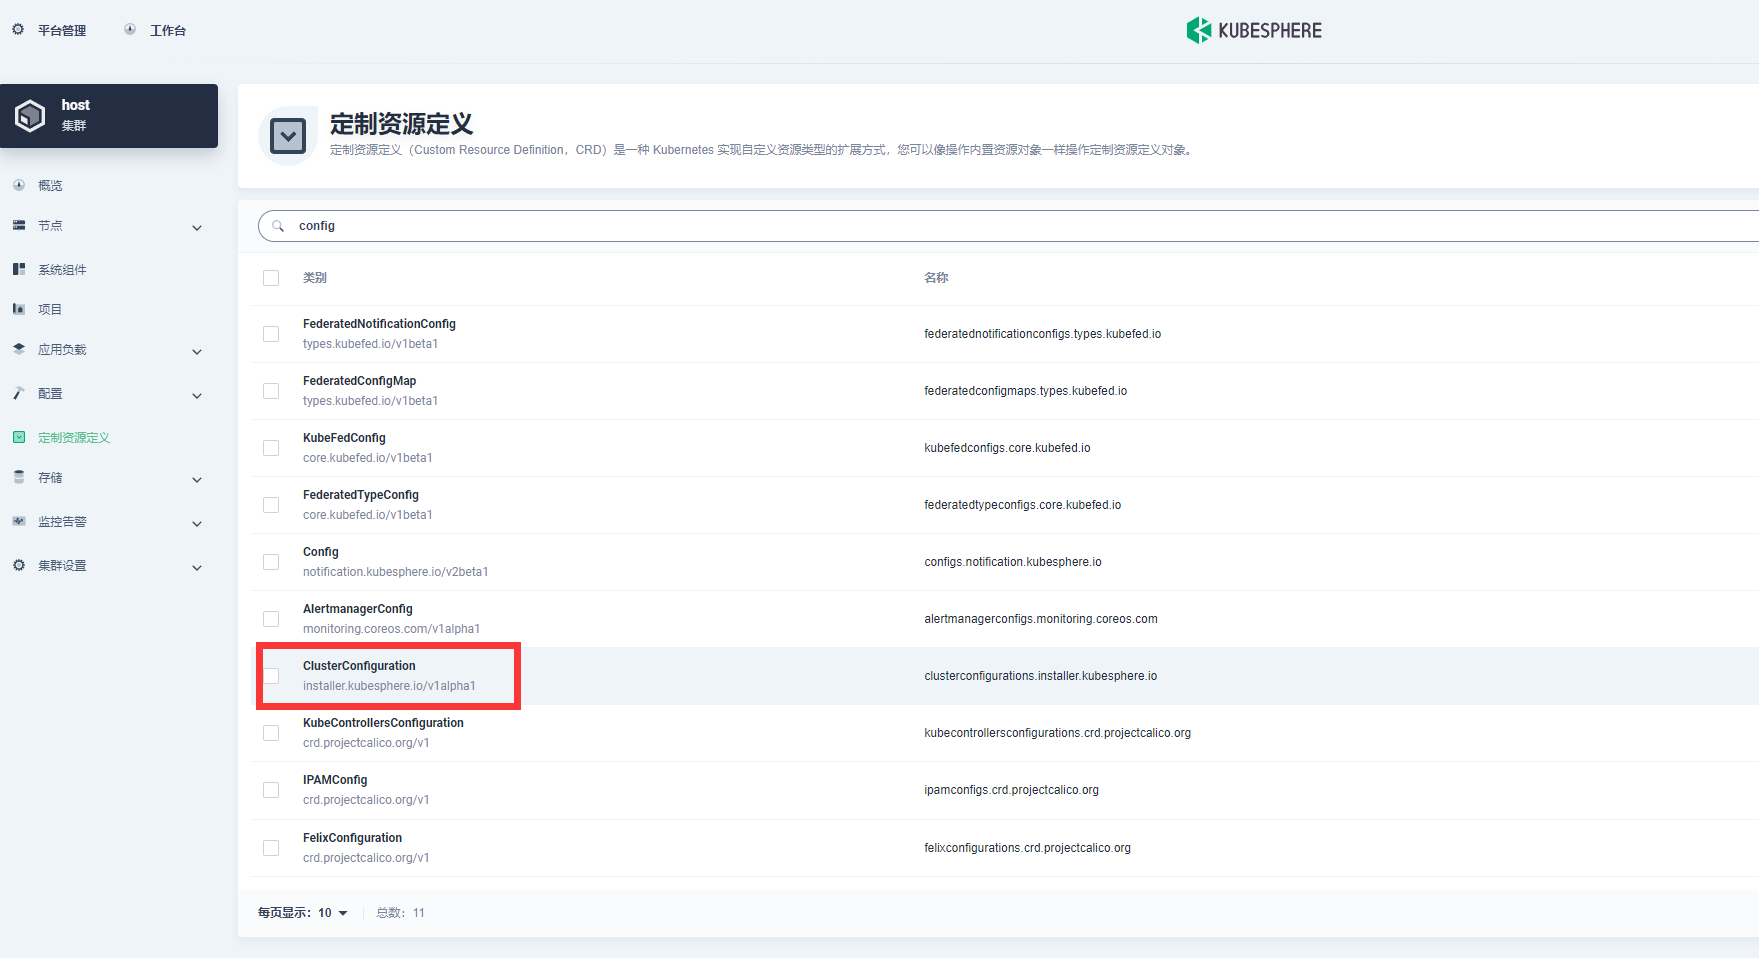
编辑yaml
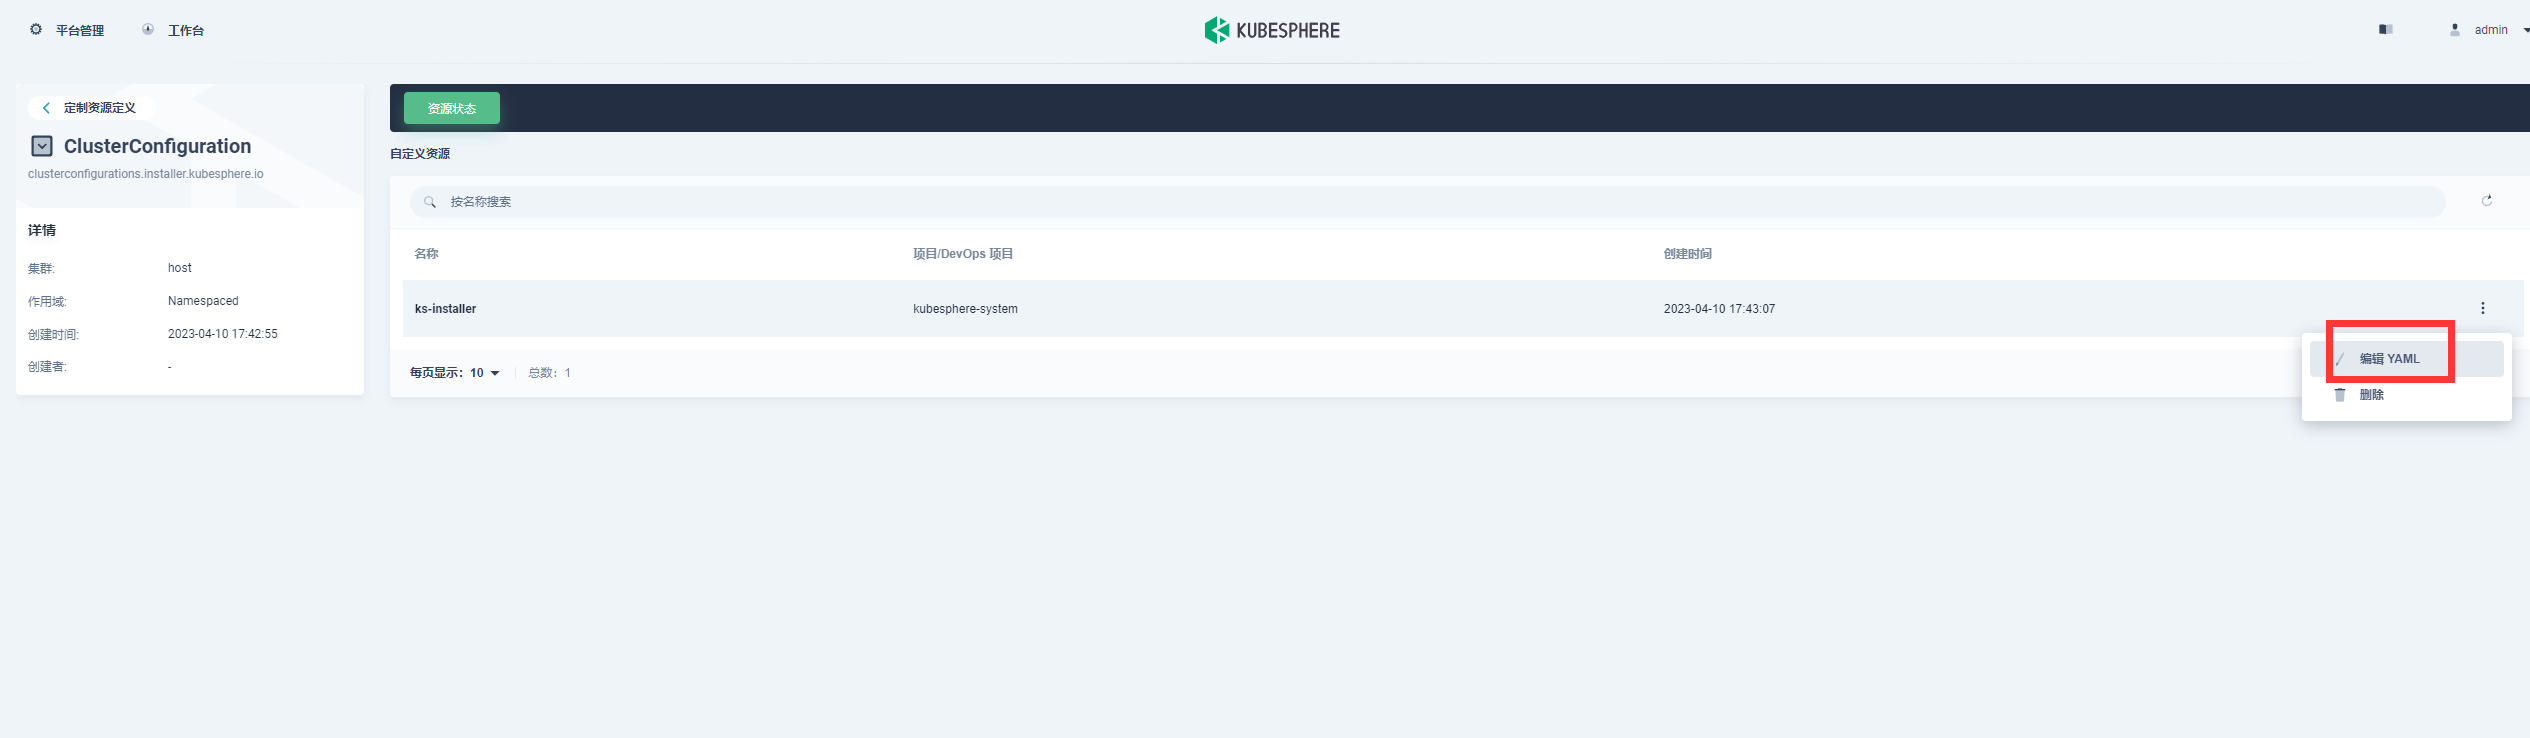
找到下面的配置,修改为host 默认为none
  multicluster:
    clusterRole: host
相关的2行最好都修改了,然后点击确定。
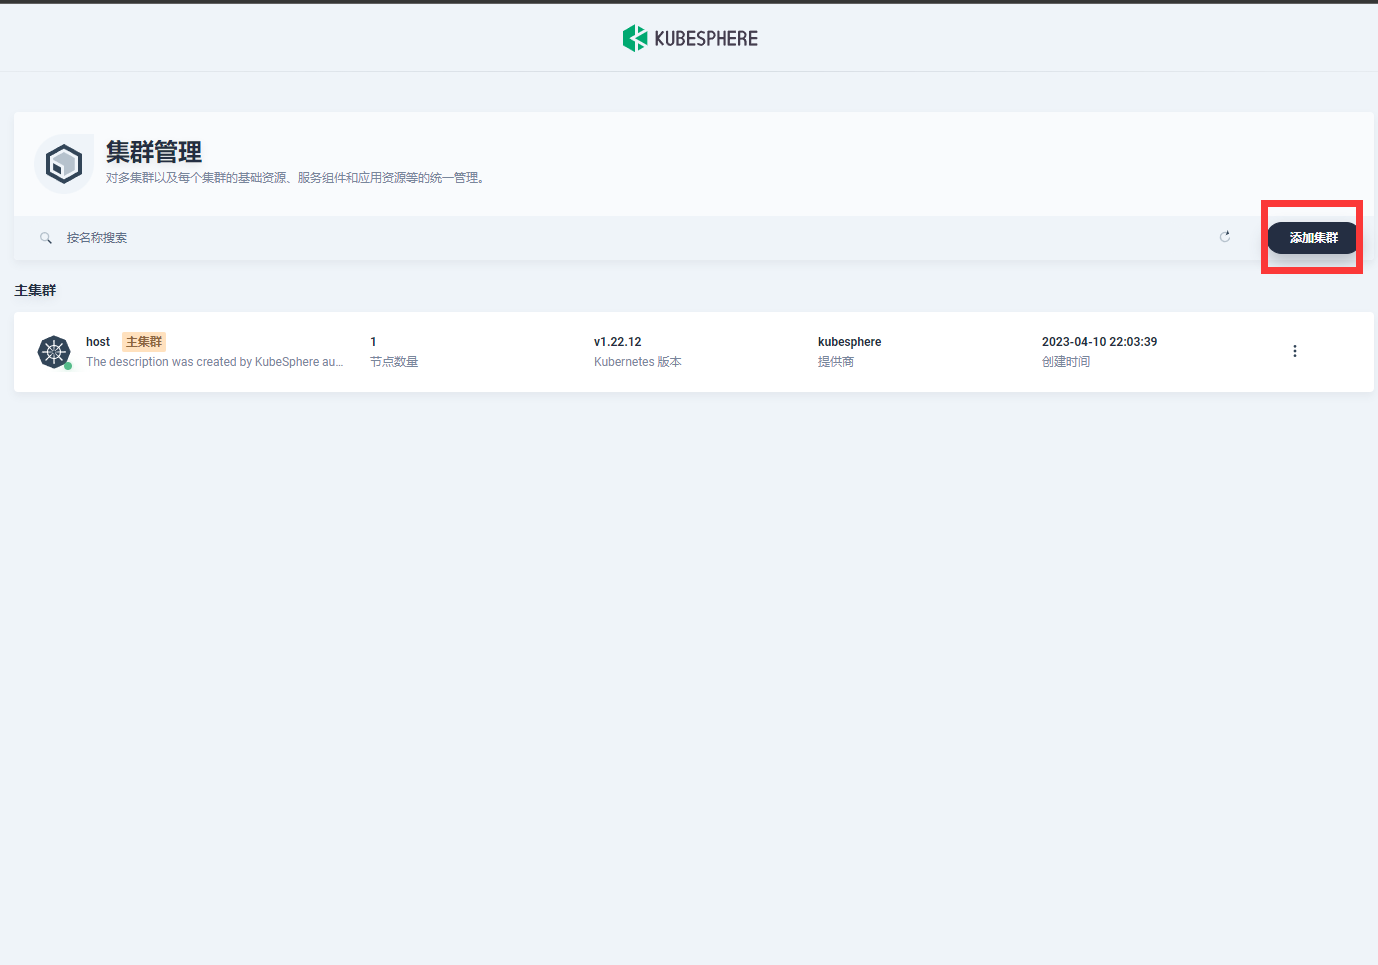
等待1-5分钟,重新登录集群
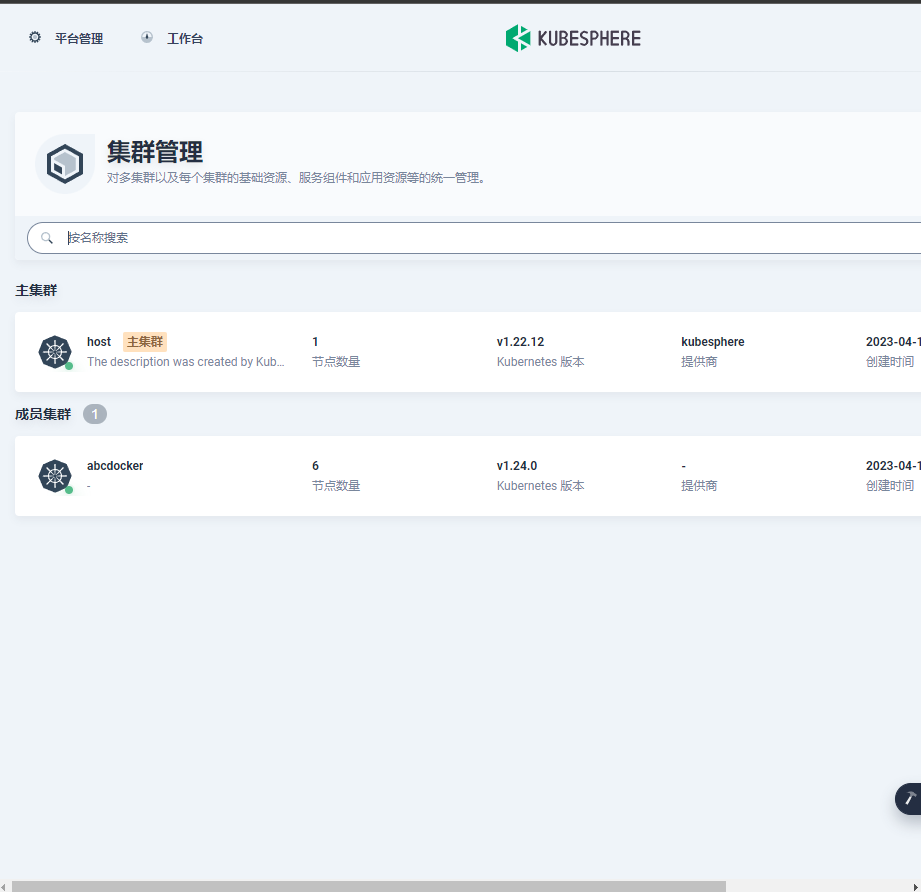
此时我们就可以添加额外的集群了
过滤jwtSecret,用于
kubectl -n kubesphere-system get cm kubesphere-config -o yaml | grep -v "apiVersion" | grep jwtSecret添加集群测试
在自建的K8s当中,我们还需要创建sc
cat >>default-storage-class.yaml<<EOF
kind: StorageClass
apiVersion: storage.k8s.io/v1
metadata:
  name: local
  annotations:
    cas.openebs.io/config: |
      - name: StorageType
        value: "hostpath"
      - name: BasePath
        value: "/var/openebs/local/"
    kubectl.kubernetes.io/last-applied-configuration: >
      {"apiVersion":"storage.k8s.io/v1","kind":"StorageClass","metadata":{"annotations":{"cas.openebs.io/config":"-
      name: StorageType\n  value: \"hostpath\"\n- name: BasePath\n  value:
      \"/var/openebs/local/\"\n","openebs.io/cas-type":"local","storageclass.beta.kubernetes.io/is-default-class":"true","storageclass.kubesphere.io/supported-access-modes":"[\"ReadWriteOnce\"]"},"name":"local"},"provisioner":"openebs.io/local","reclaimPolicy":"Delete","volumeBindingMode":"WaitForFirstConsumer"}
    openebs.io/cas-type: local
    storageclass.beta.kubernetes.io/is-default-class: 'true'
    storageclass.kubesphere.io/supported-access-modes: '["ReadWriteOnce"]'
provisioner: openebs.io/local
reclaimPolicy: Delete
volumeBindingMode: WaitForFirstConsumer
EOF

kubectl apply -f default-storage-class.yaml
检查sc创建状态
[root@k8s-master-01 ks]# kubectl get sc -A
NAME              PROVISIONER        RECLAIMPOLICY   VOLUMEBINDINGMODE      ALLOWVOLUMEEXPANSION   AGE
local (default)   openebs.io/local   Delete          WaitForFirstConsumer   false                  144m
接下来在Kubernetes中安装Kubesphere member节点使用
kubectl apply -f https://github.com/kubesphere/ks-installer/releases/download/v3.3.2/kubesphere-installer.yaml

wget https://github.com/kubesphere/ks-installer/releases/download/v3.3.2/cluster-configuration.yaml
修改配置文件
vim cluster-configuration.yaml
#修改clusterRole类型为member

  multicluster:
    clusterRole: member  #修改member
修改jwtSecret配置,这个变量是从host环境中生成的
vim cluster-configuration.yaml
#复制host节点上面的配置
    jwtSecret: "TlCHvpWOiGoOQUn3QoTEi5SGbEuam0NC"
检查安装日志:
kubectl logs -n kubesphere-system $(kubectl get pod -n kubesphere-system -l 'app in (ks-install, ks-installer)' -o jsonpath='{.items[0].metadata.name}') -f这里的链接方式我们就直接使用直连
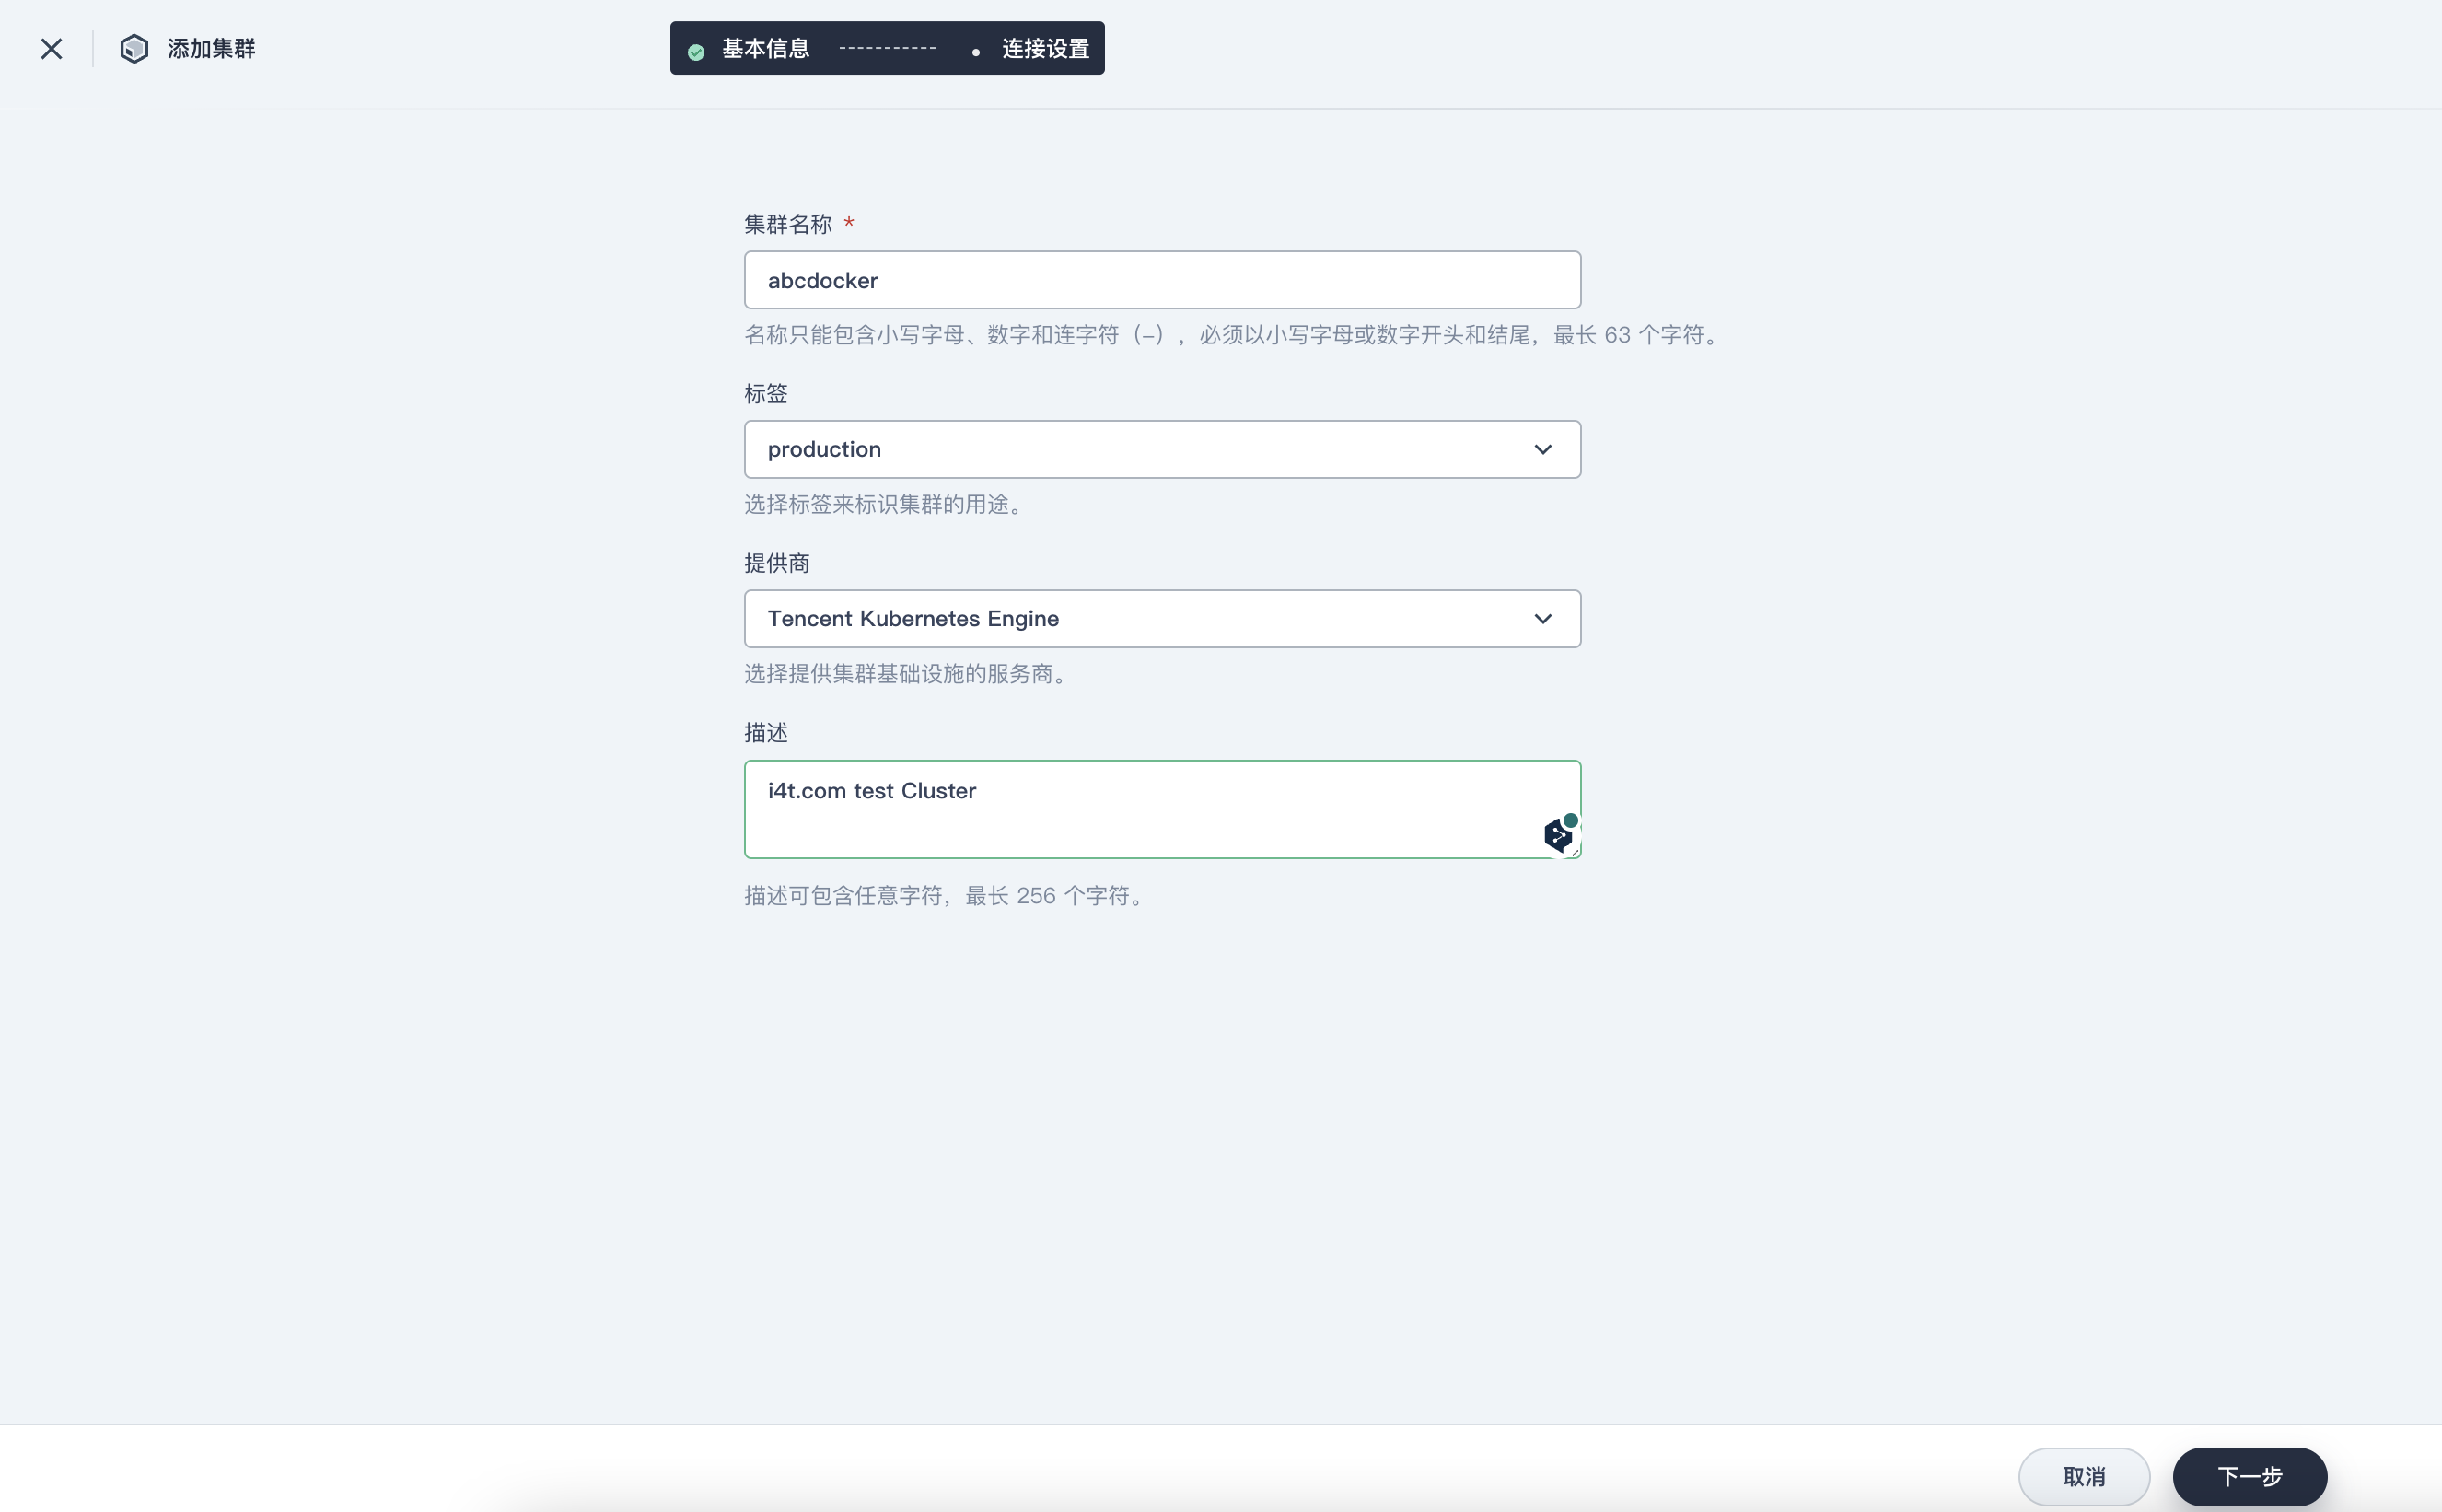
上传config文件
cat $HOME/.kube/config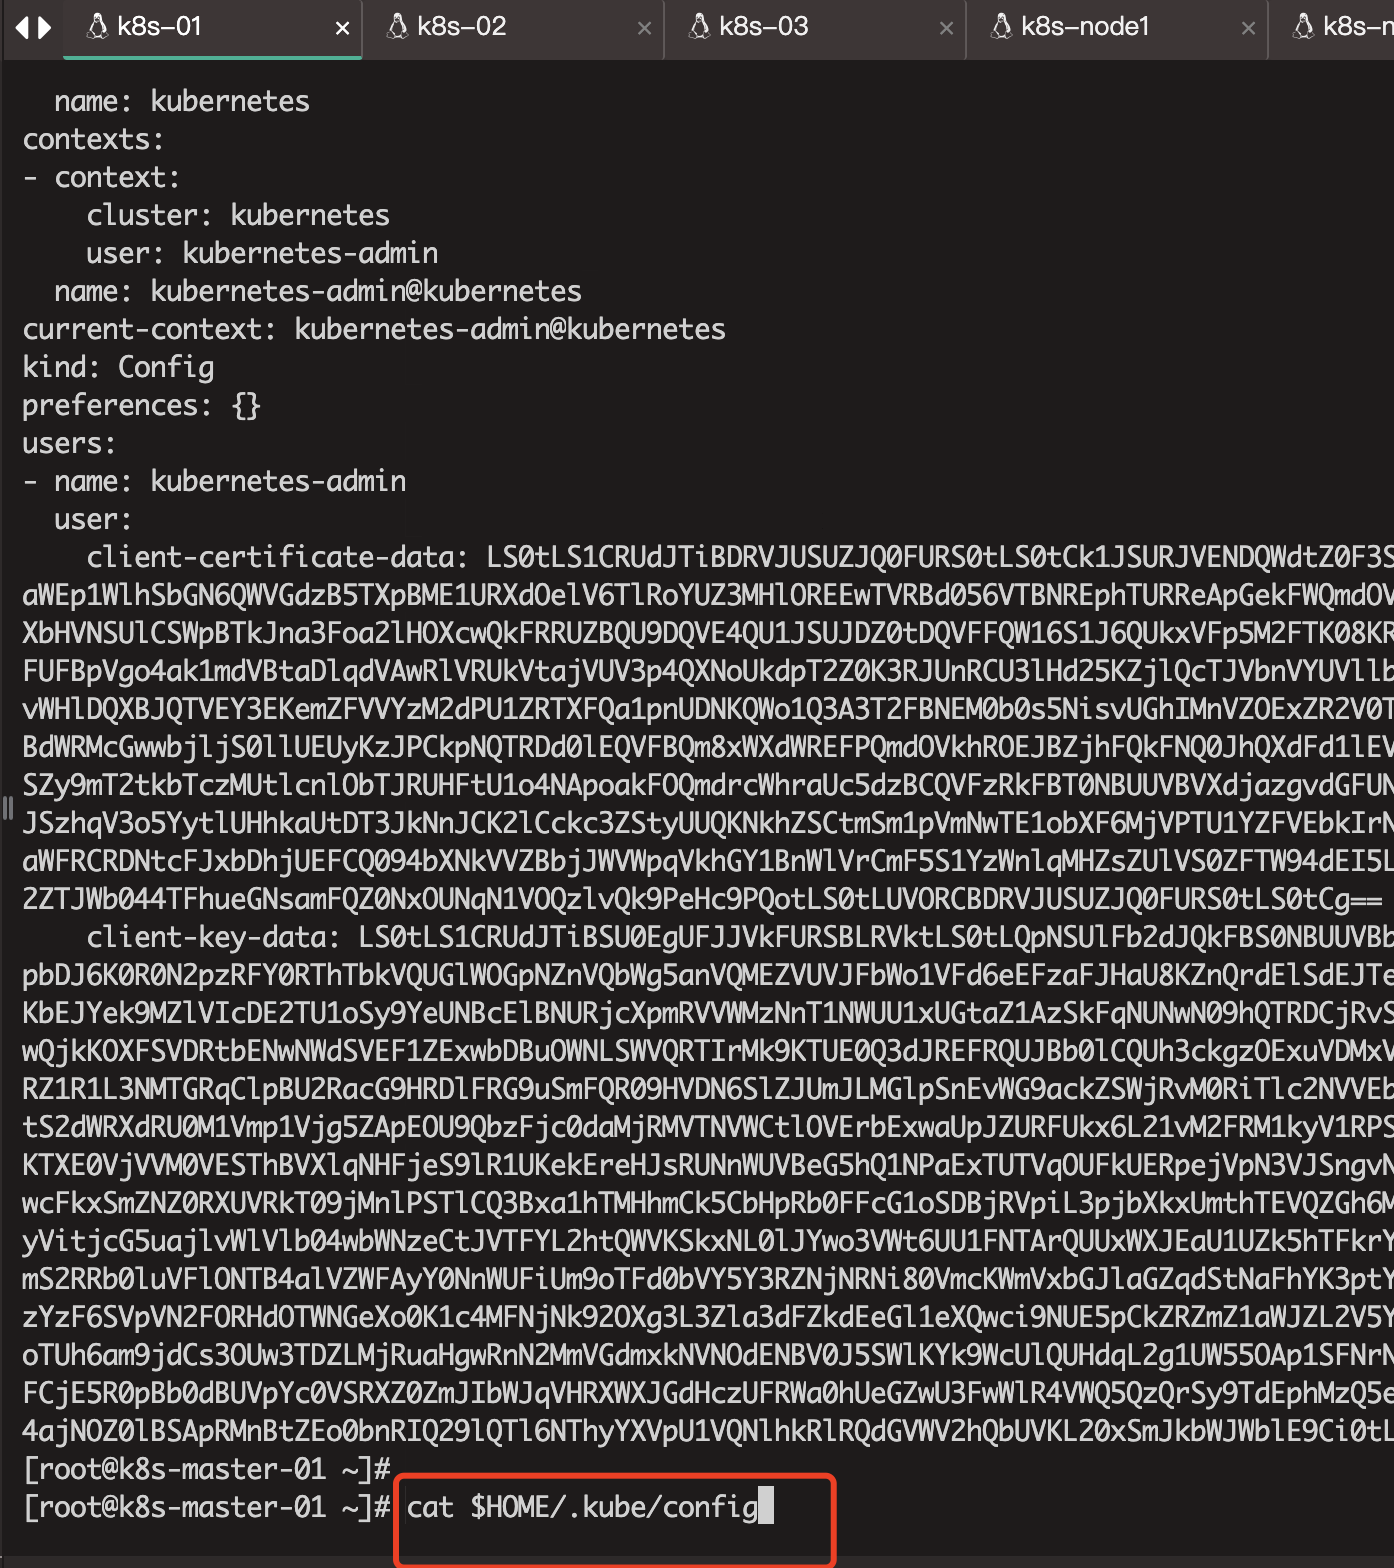
添加完成后,我们就可以在集群中看到了