
释放双眼,带上耳机,听听看~!
最近由于在阿里云从 GitHub 拖代码非常困难,因此萌生了在服务器上使用 shadowsocks 的念头。本文记录了我在 CentOS 7 上成功安装运行 shadowsocks 客户端的过程。
🤖 由 ChatGPT 生成的文章摘要

CentOS 7安装配置
Linux
客户端为CentOS(一般Linux环境)时,(尤其是命令行里的命令)使用shadowsocks搭配Privoxy上网的方法。
关于Shadowsocks Python版一键安装脚本 可以参考我之前的文章
一、安装
1.安装客户端shadowsocks
$ yum install python-pip
$ pip install shadowsocks
Pip 是 Python 的包管理工具,这里我们用 pip 安装 shadowsocks。
2.编辑配置文件
$ mkdir -p /etc/shadowsocks
$ vim /etc/shadowsocks/shadowsocks.json

添加以下内容
{
    "server":"XXXXX",
    "server_port":1300,
    "local_address": "127.0.0.1",
    "local_port":1080,
    "password":"123456",
    "timeout":300,
    "method":"aes-256-cfb",
    "fast_open": false,
    "workers": 1
}

参数说明:
server:Shadowsocks服务器地址
server_port:Shadowsocks服务器端口
local_address:本地IP
local_port:本地端口
password:Shadowsocks连接密码
timeout:等待超时时间

method:加密方式
可选aes-128-cfb, aes-192-cfb, aes-256-cfb, bf-cfb, cast5-cfb, des-cfb, rc4-md5, chacha20, salsa20, rc4, table

workers:工作线程数
fast_open:true或false。开启fast_open以降低延迟,但要求Linux内核在3.7+。
开启方法 echo 3 > /proc/sys/net/ipv4/tcp_fastopen
3.配置自启动
新建启动脚本/usr/lib/systemd/system/shadowsocks,内容如下

[Unit]
Description=Shadowsocks
[Service]
TimeoutStartSec=0
ExecStart=/usr/bin/sslocal -c /etc/shadowsocks/shadowsocks.json
[Install] WantedBy=multi-user.target

使用脚本启动
systemctl enable shadowsocks
systemctl start shadowsocks
systemctl status shadowsocks


也可以s执行命令
$ nohup sslocal -c /etc/shadowsocks.json  /dev/null 2>&1 &
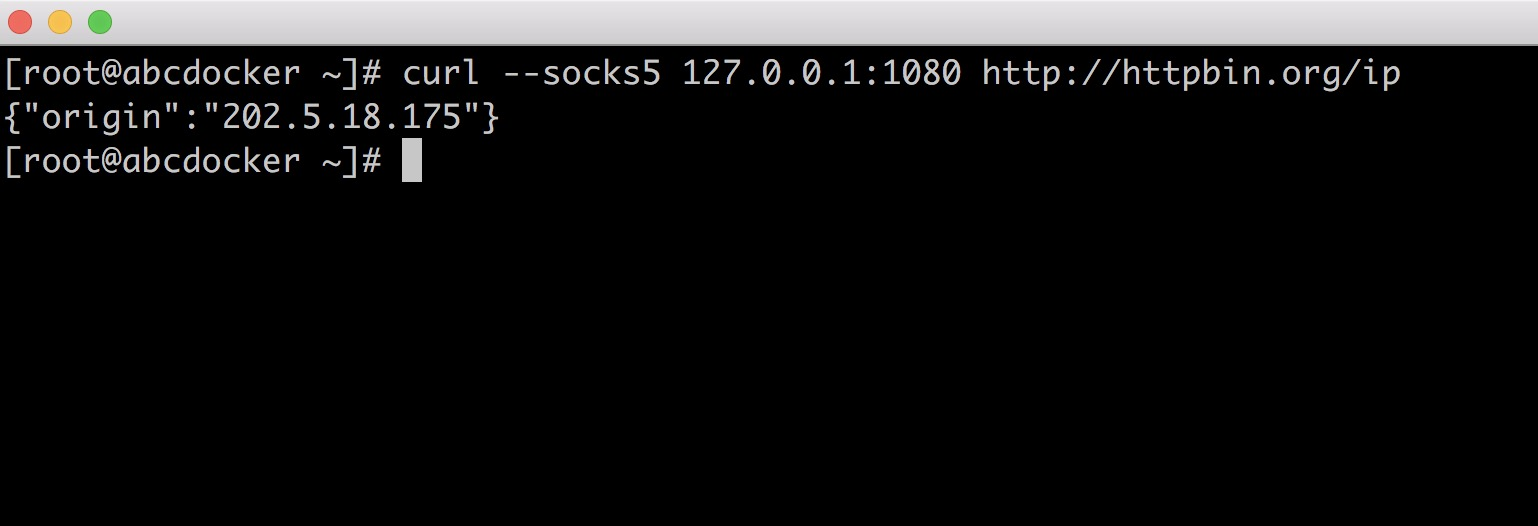
4.验证Shadowsocks客户端是否正常运行
curl --socks5 127.0.0.1:1080 http://httpbin.org/ip
#这里的配置地址就是我们上面配置客户端的IP和端口

若Shadowsock客户端已正常运行,则结果如下:
 {
      "origin": "x.x.x.x"       #你的Shadowsock服务器IP
}
如下图演示
5. 安装配置Privoxy
Shadowsocks是一个 socket5 服务,我们需要使用 Privoxy 把流量转到 http/https 上。
虽然socks代理起来了,但是还不能直接用,需要privoxy转发一下
安装Privoxy
$ yum -y install privoxy

启动Privoxy
$ systemctl enable privoxy
$ systemctl start privoxy
$ systemctl status privoxy

配置Privoxy
修改配置文件/etc/privoxy/config

$ vim /etc/privoxy/config
listen-address 127.0.0.1:8118           #8118 是默认端口
forward-socks5t / 127.0.0.1:1080        #转发到本地端口
#我们打开注释就可以,要确保只有一个!
6.配置环境变量
$ vim /etc/profile
export http_proxy=http://127.0.0.1:8118  #这里的端口和上面 privoxy 中的保持一致
export https_proxy=http://127.0.0.1:8118

$ source /etc/profile
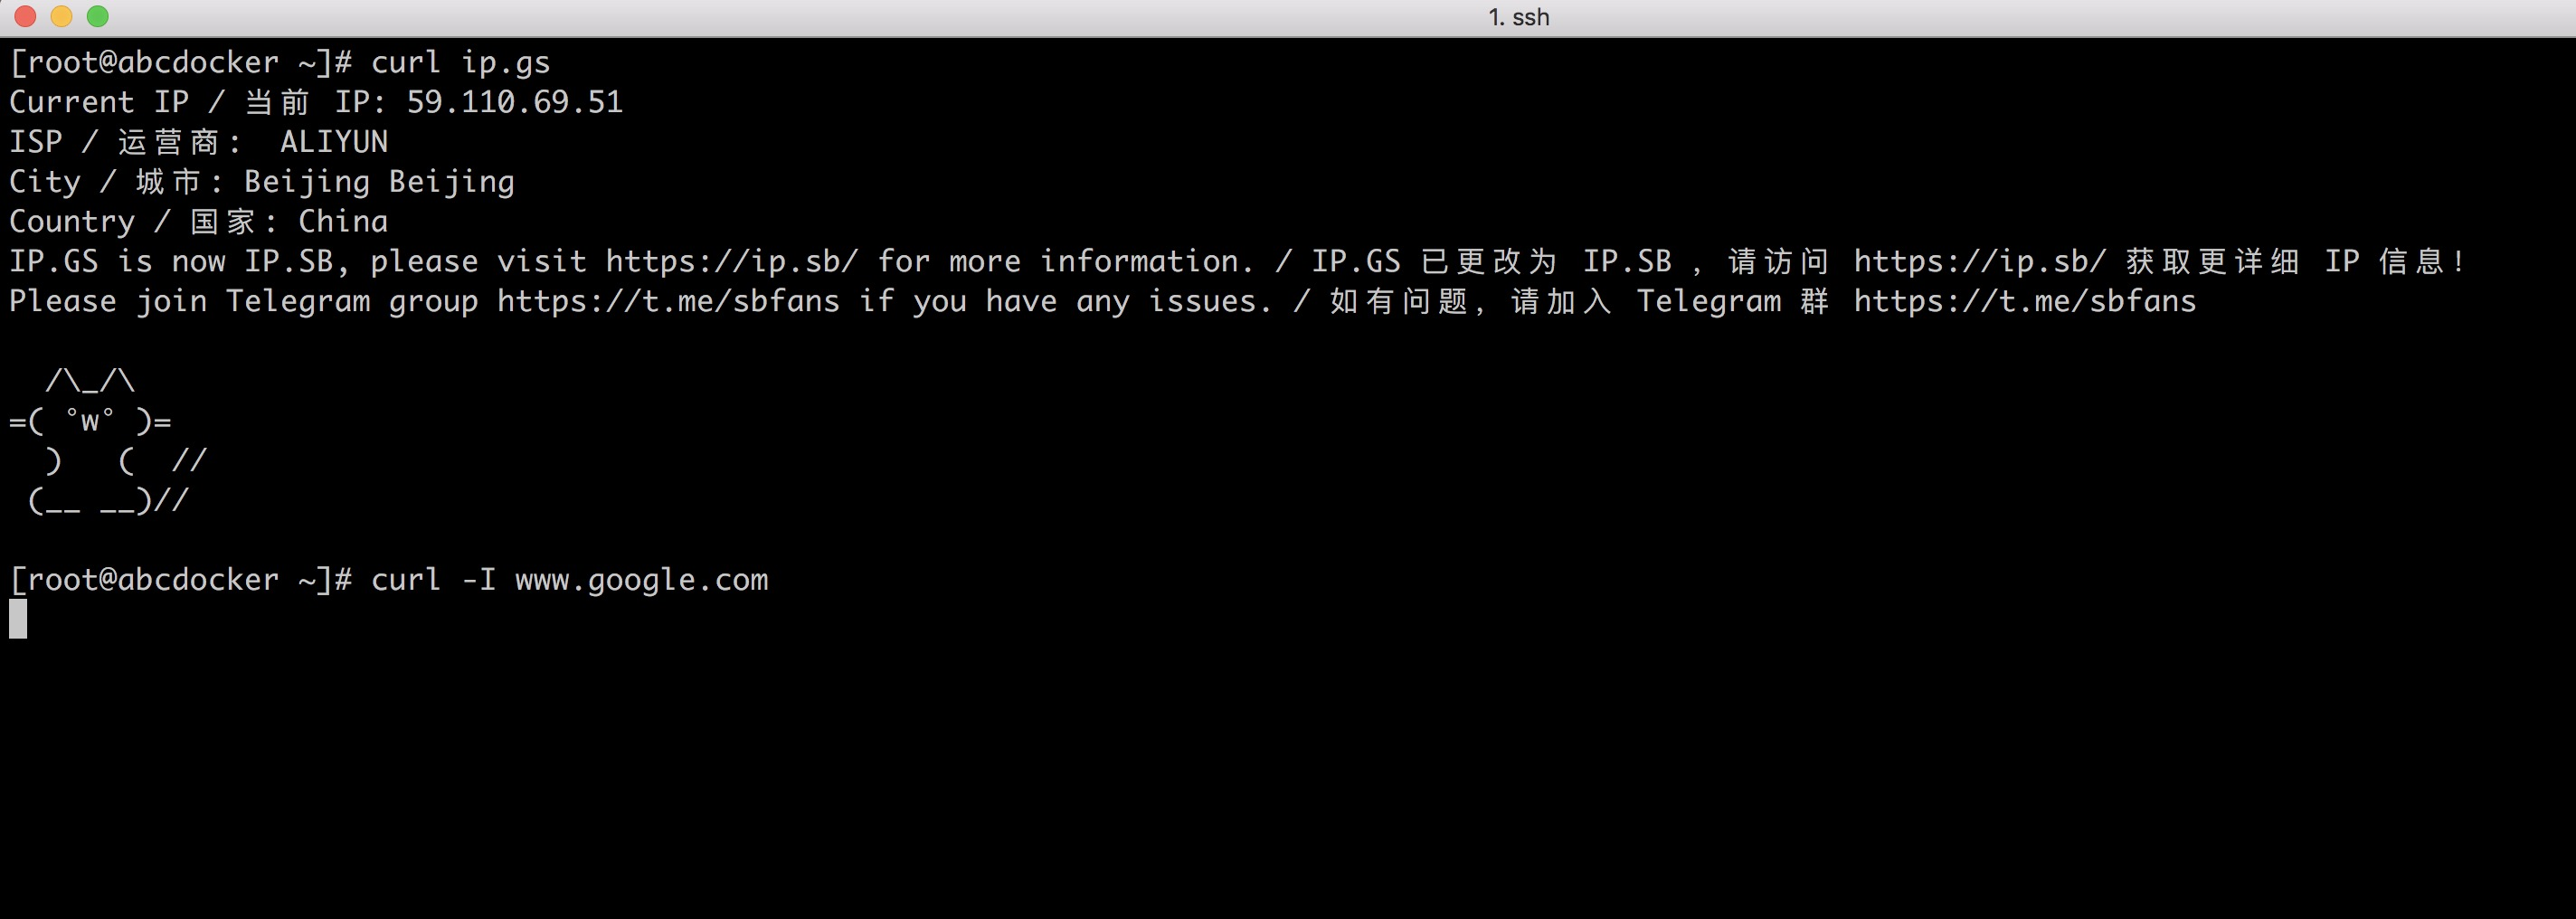
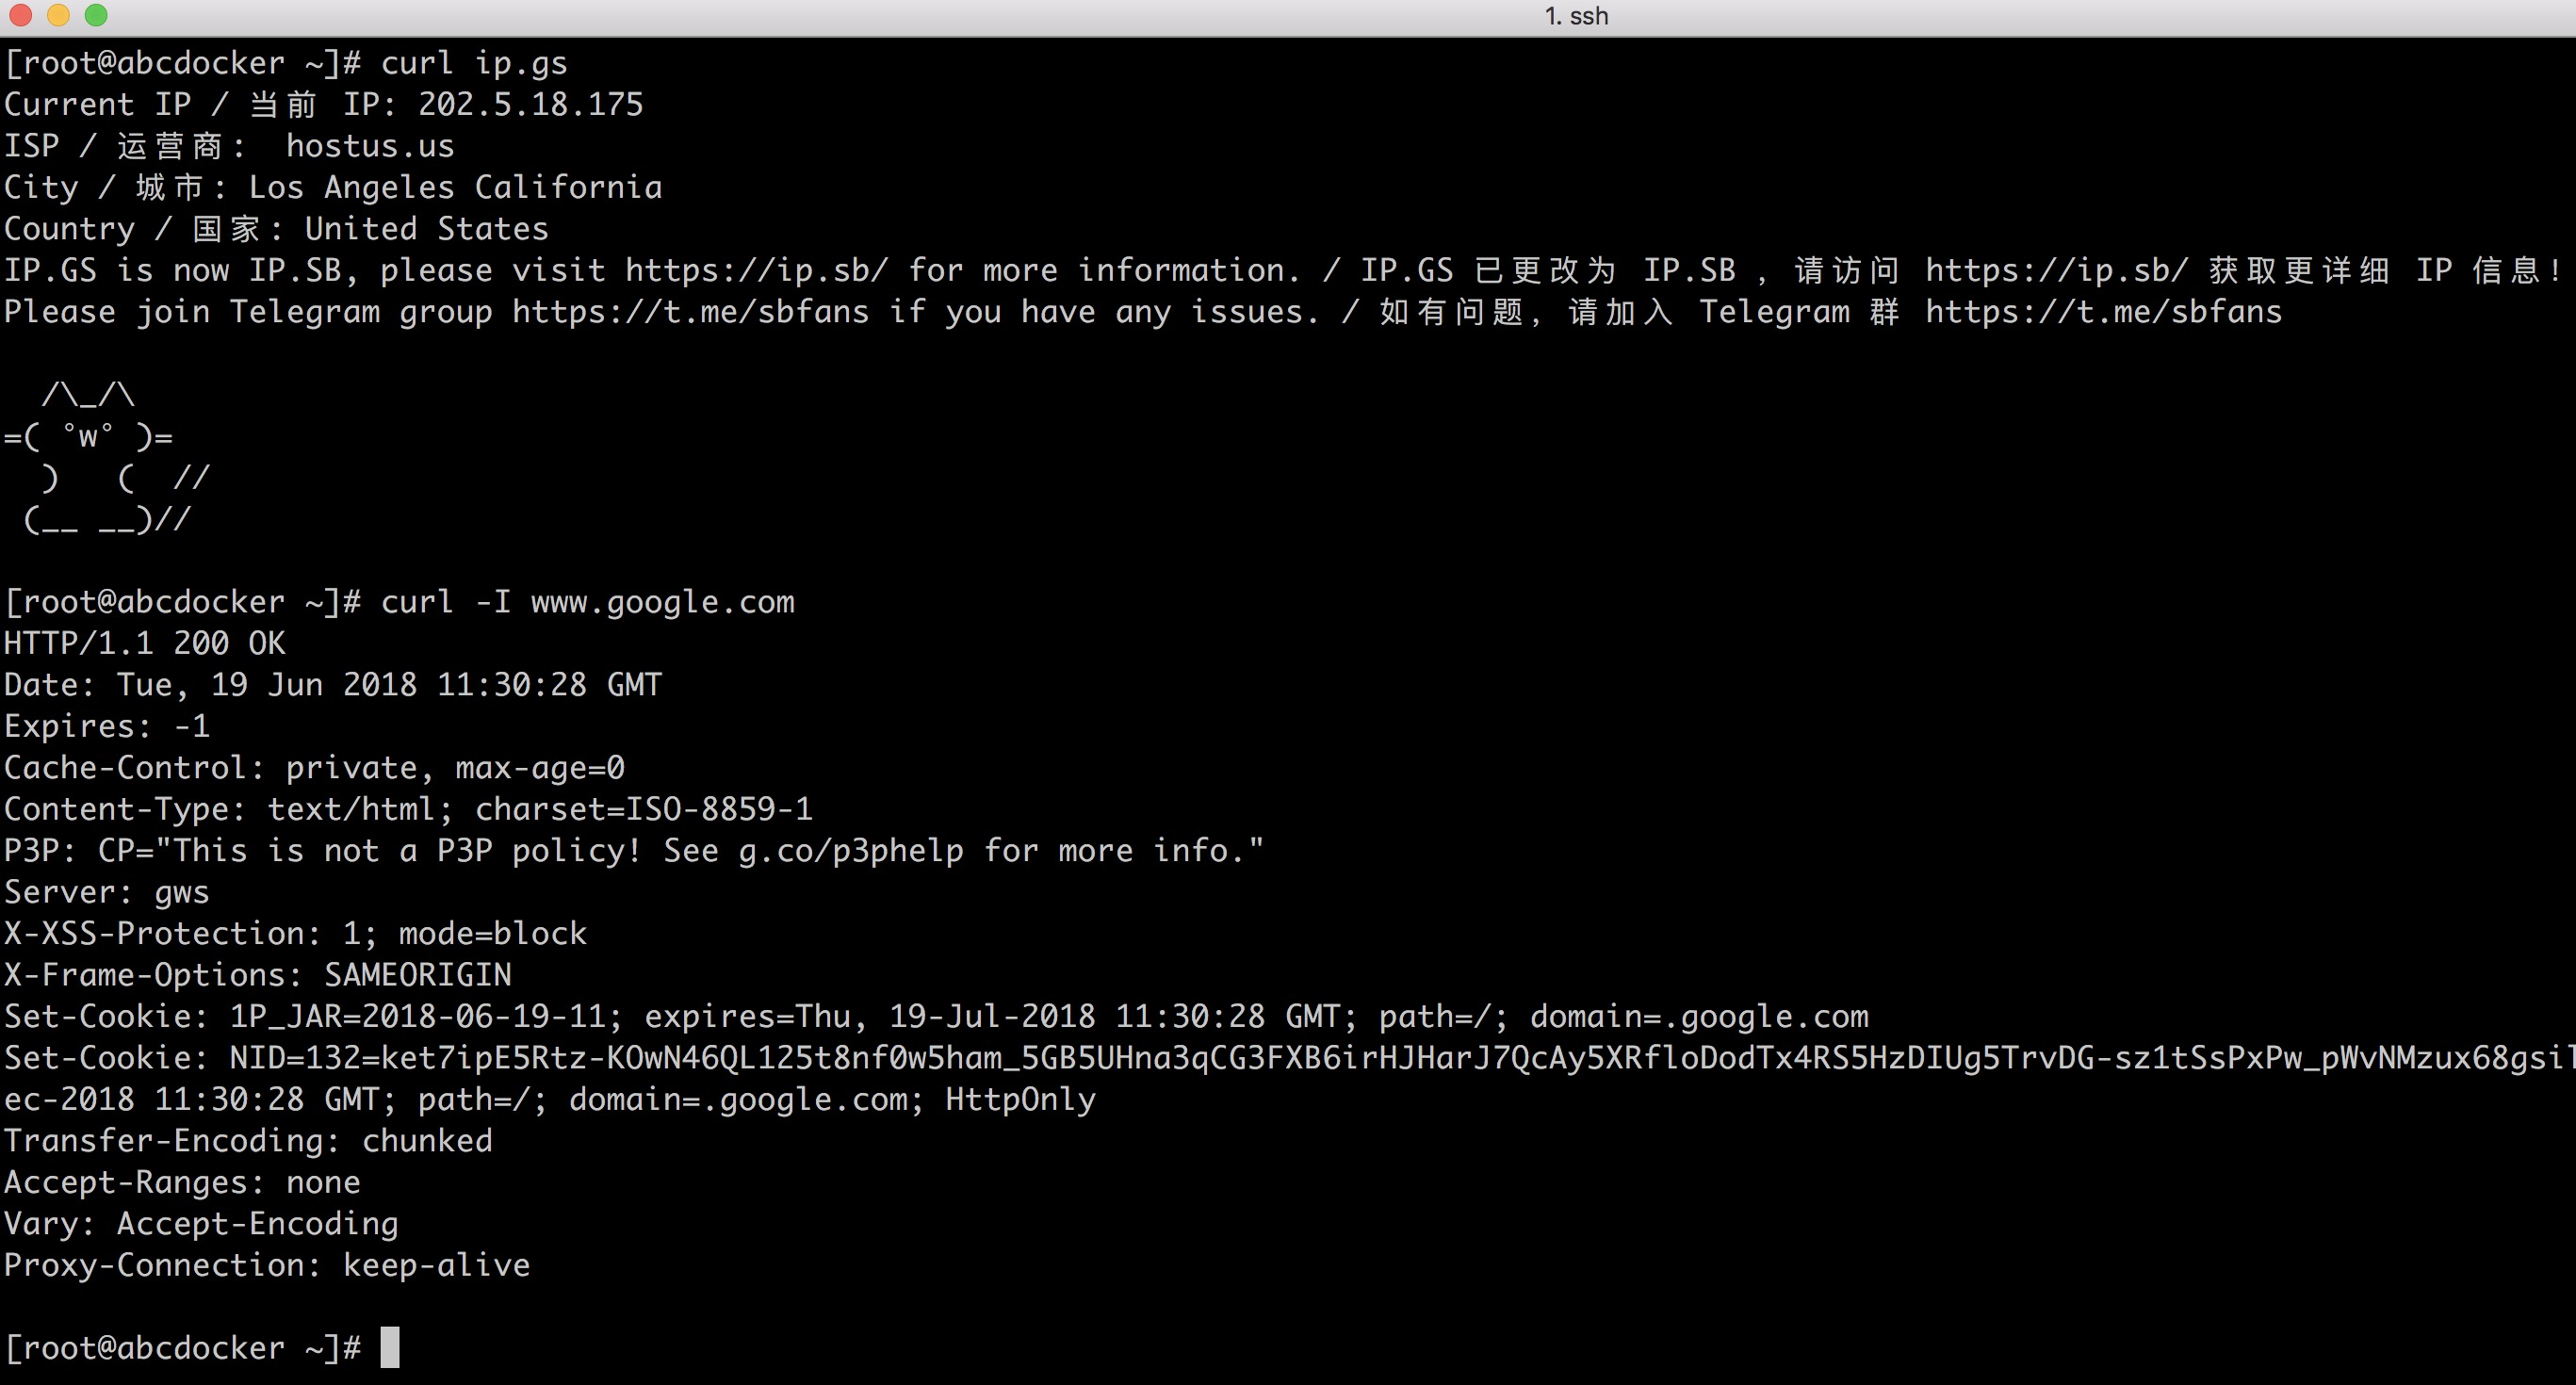
二、验证
验证是否可以翻墙
$ curl ip.gs
显示为本地IP信息则是没有开启代理
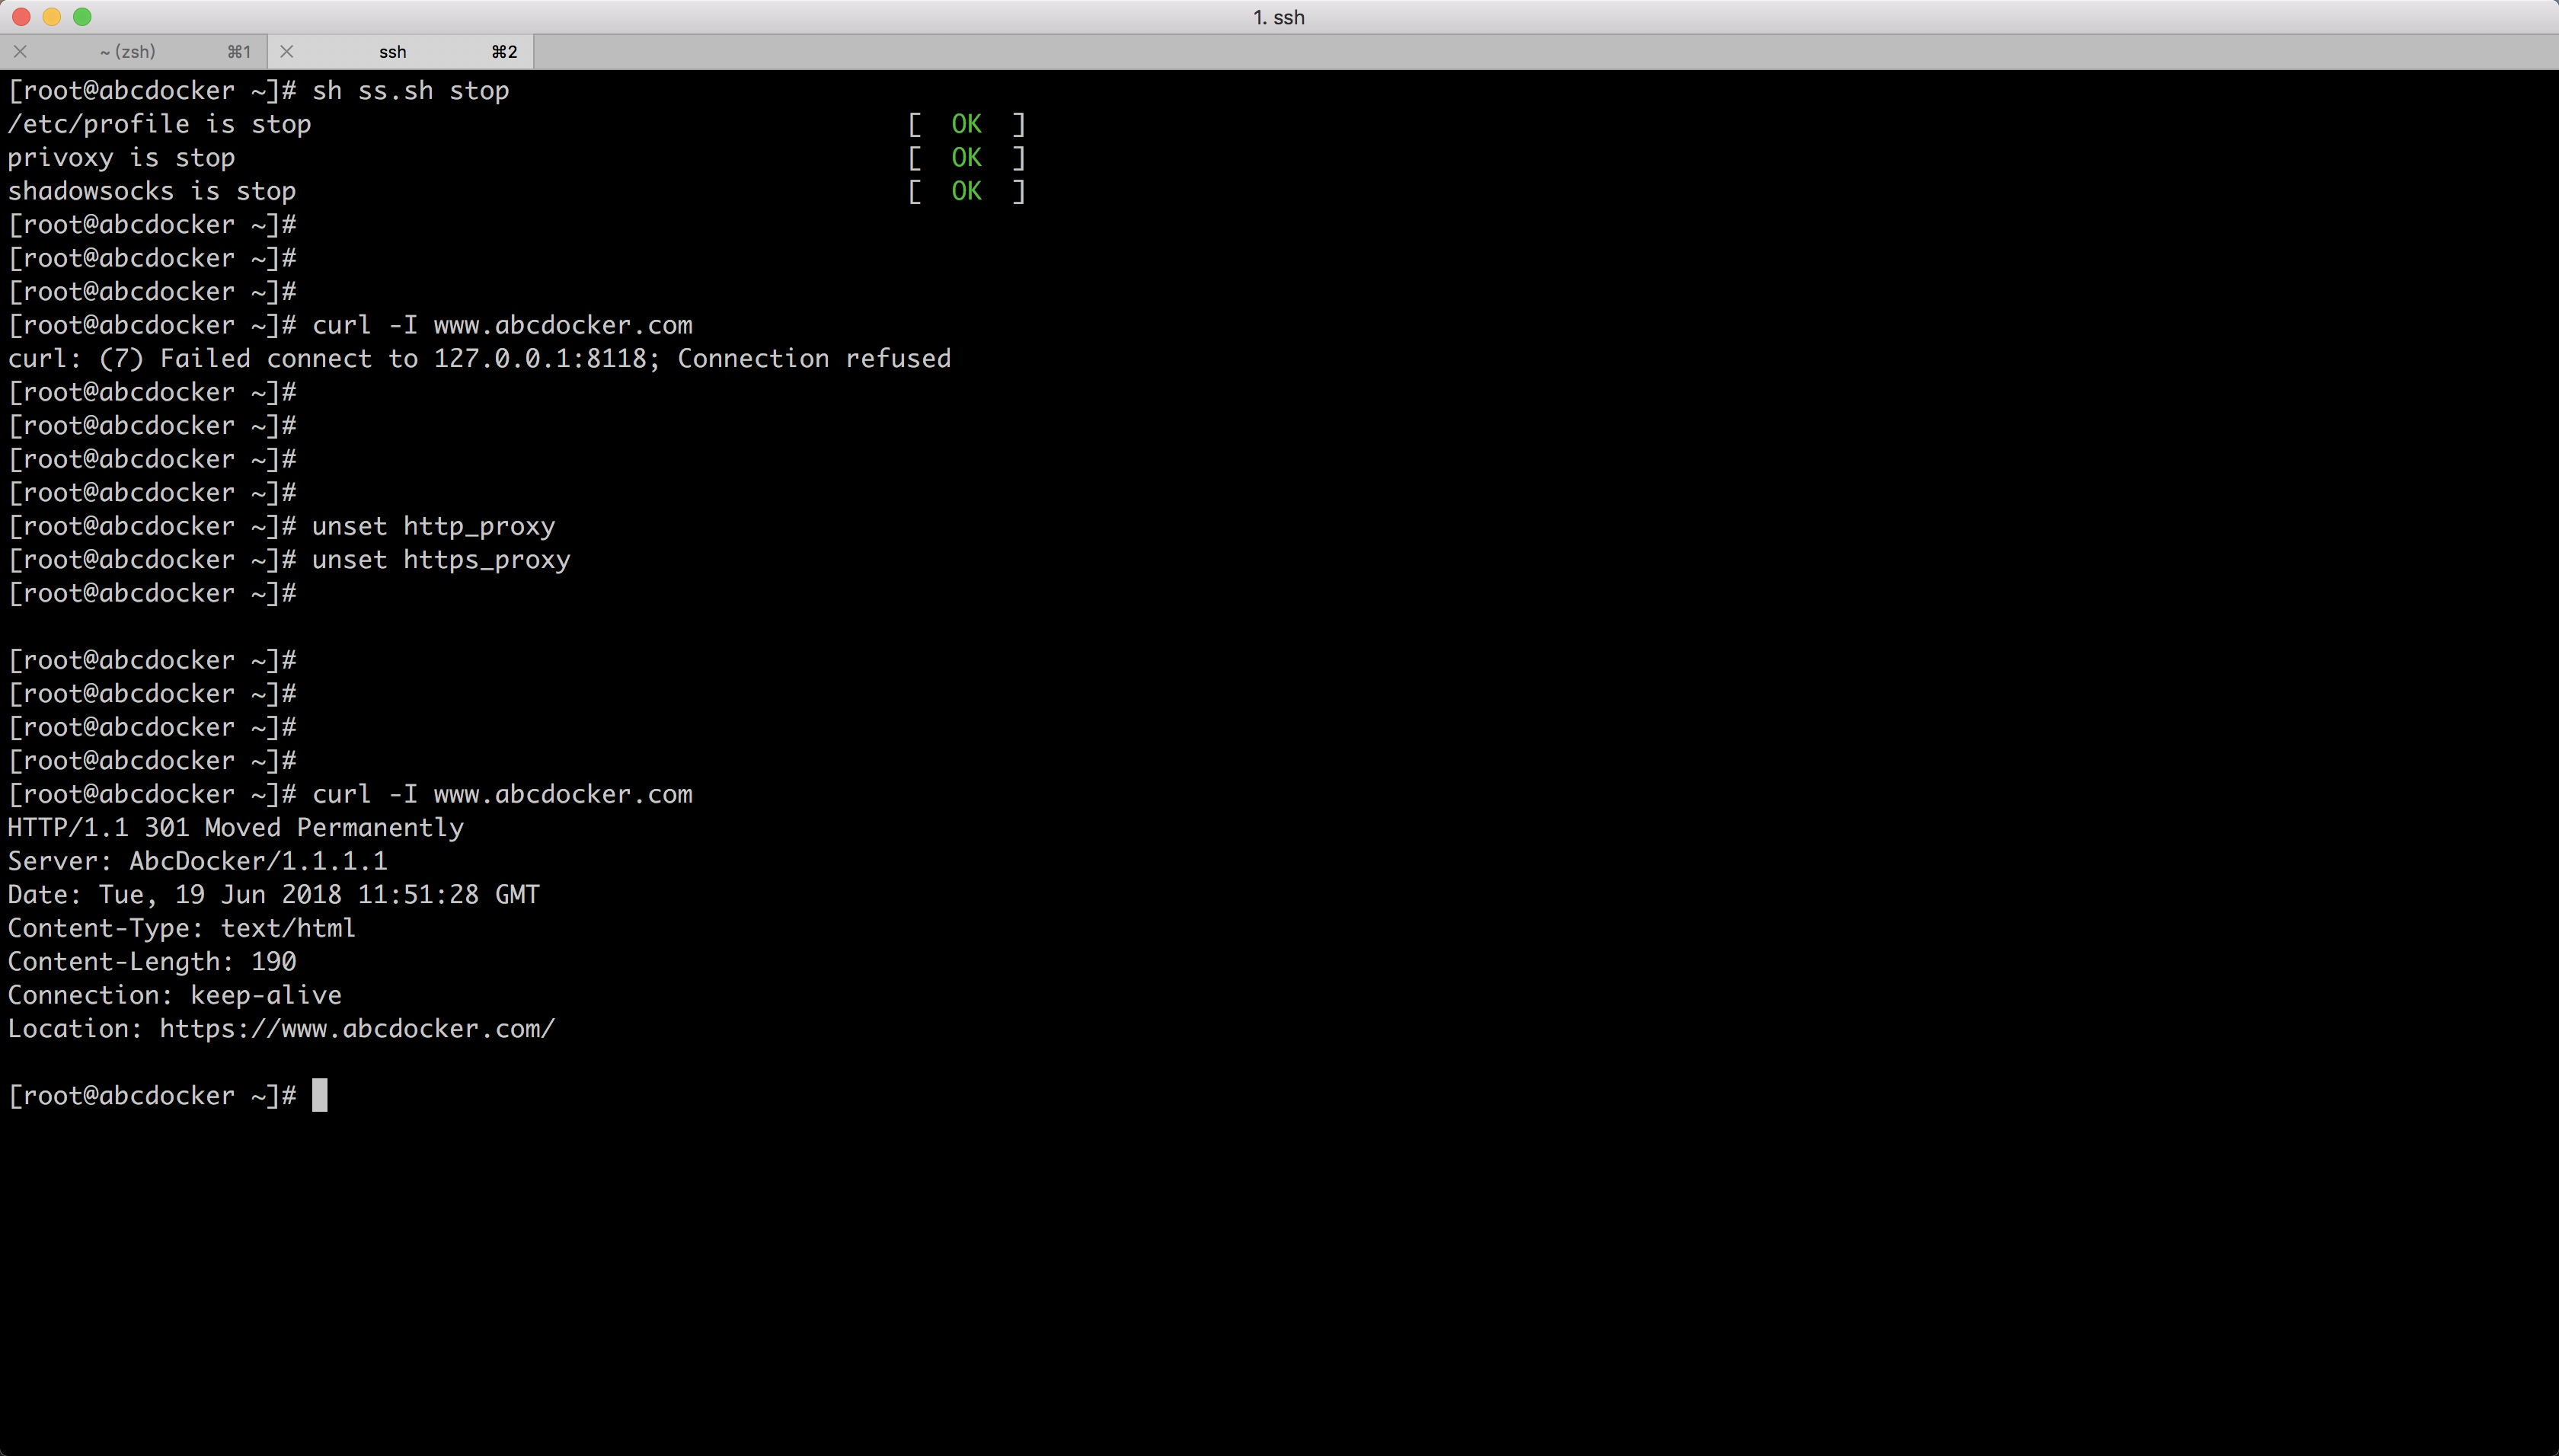
未开启
已开启
9.启动脚本
启动脚本是关闭ss,关闭Privoxy,注销/etc/profile
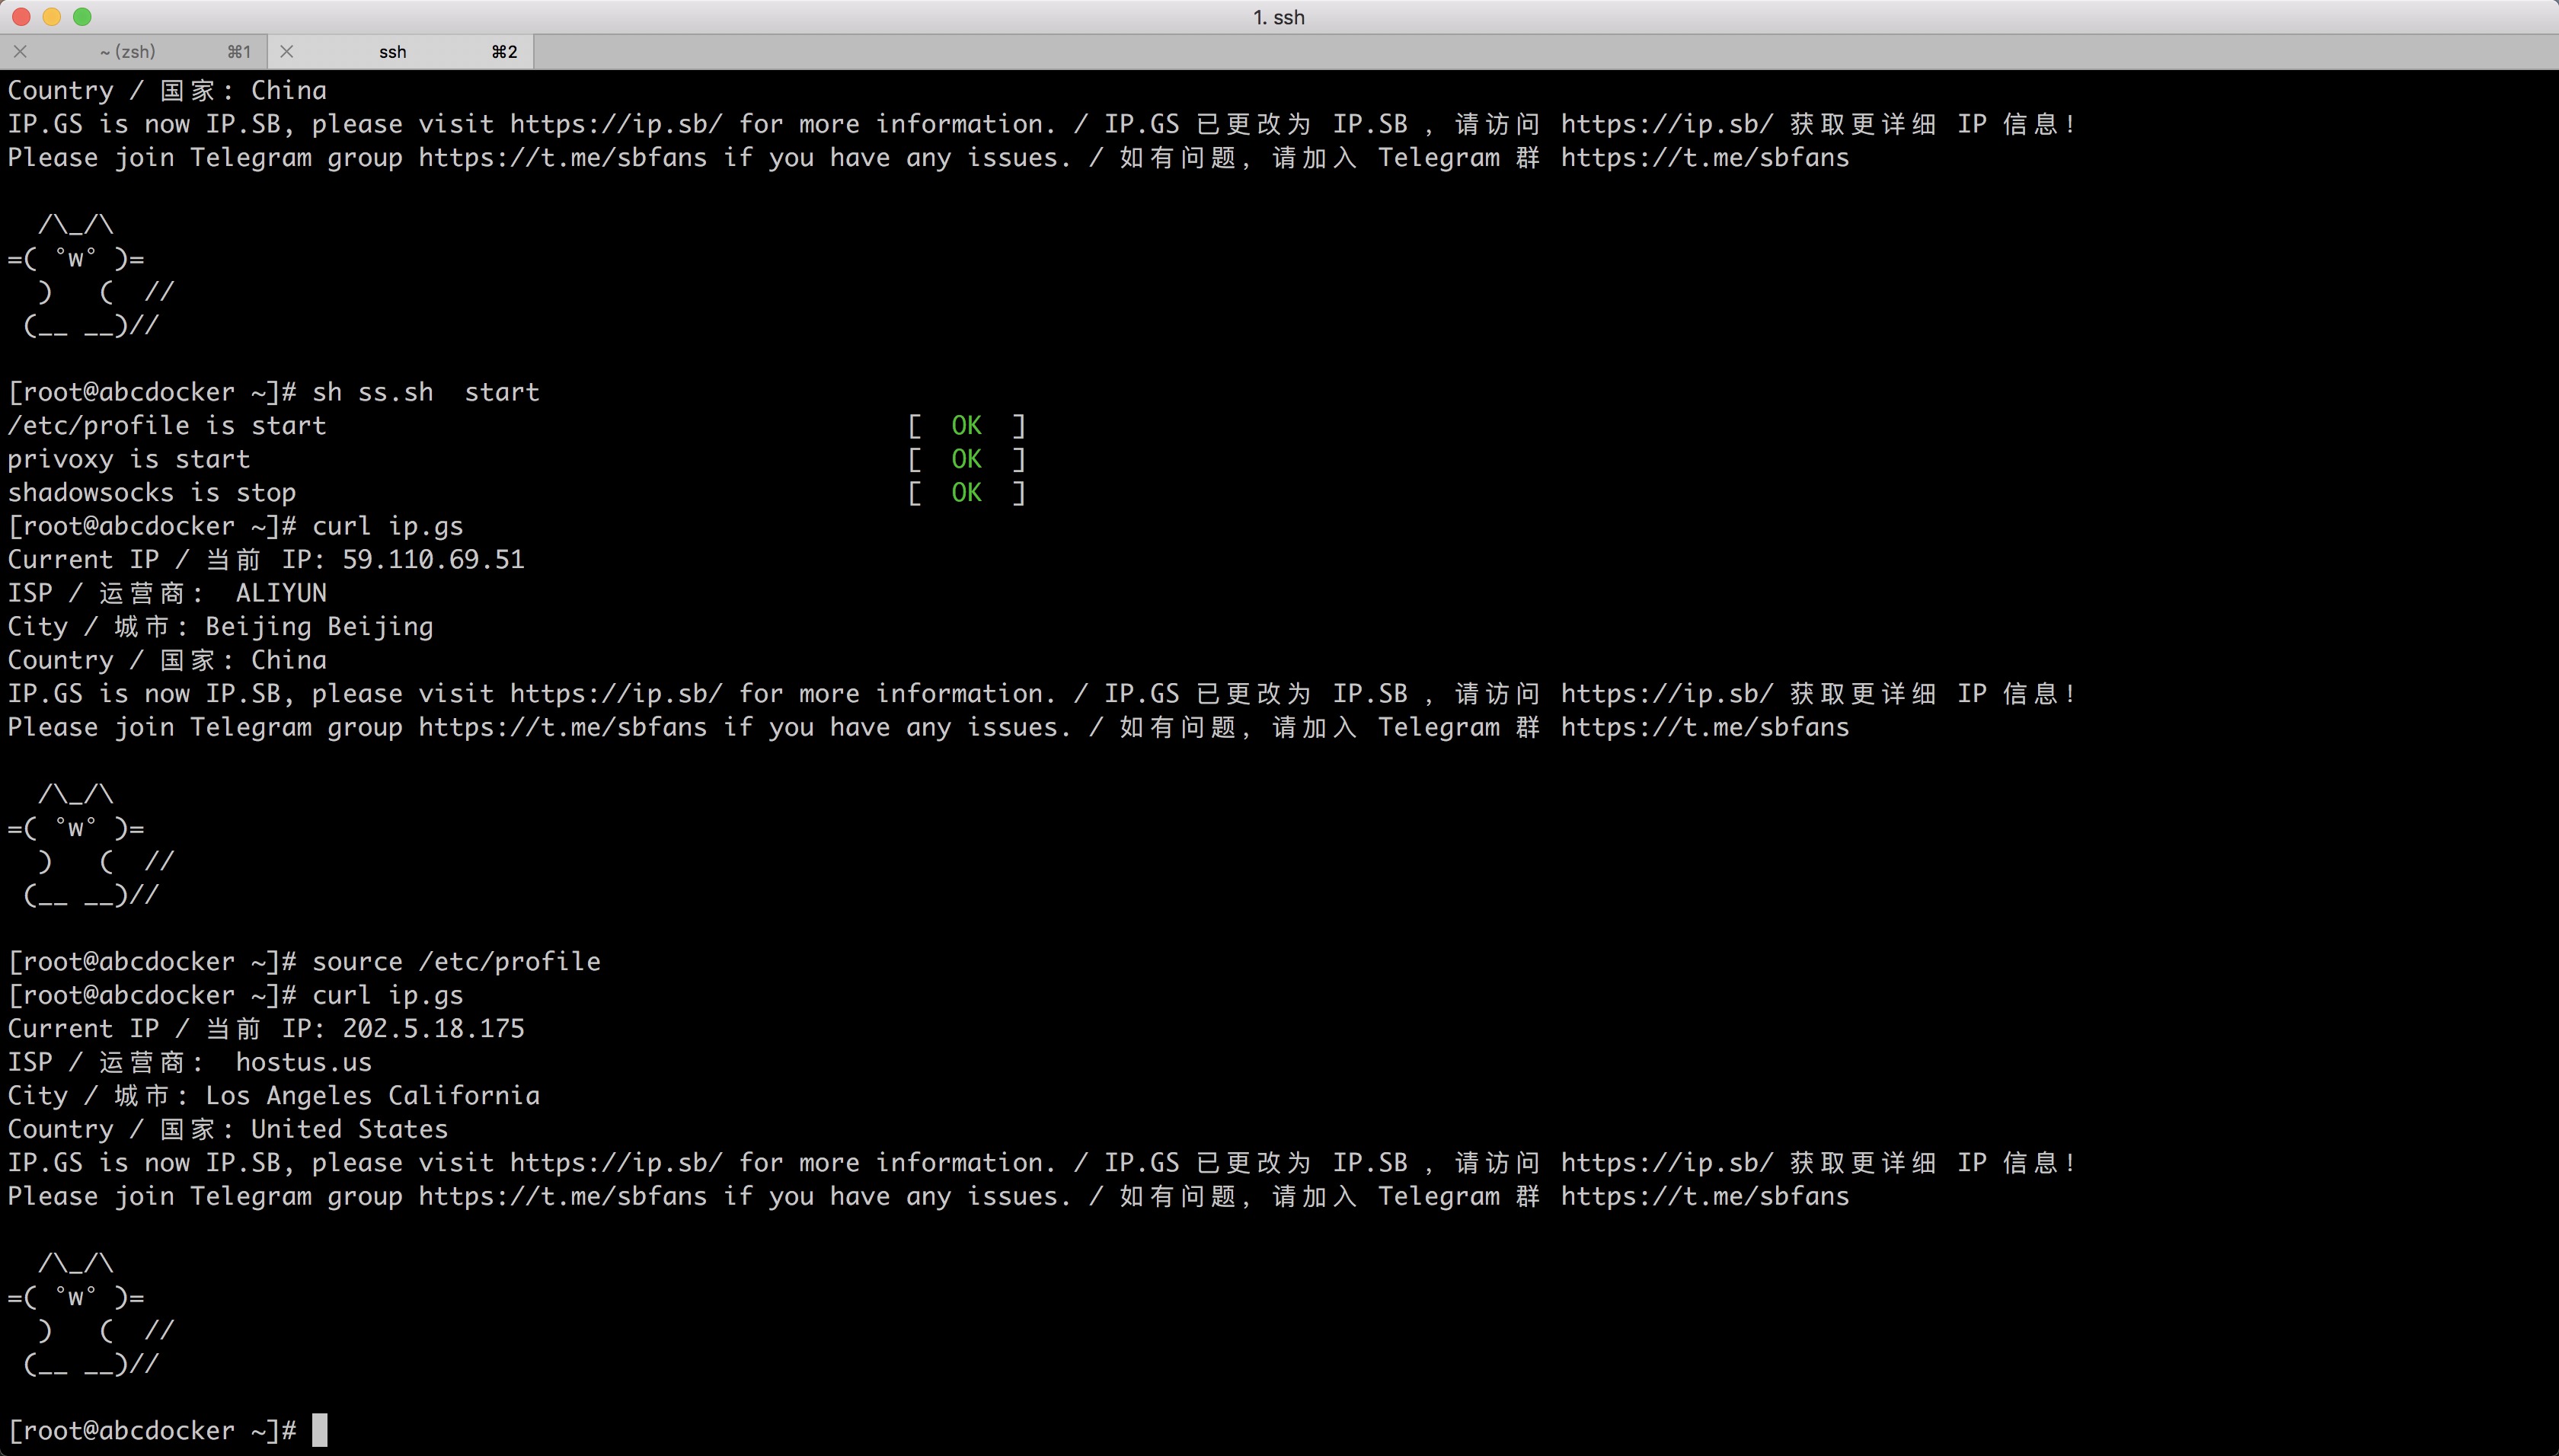
温馨提示:如果我们脚本出现如下问题,请执行执行以下命令即可恢复
source /etc/profile
或者
unset http_proxy
unset https_proxy
脚本内容如下,放到/etc/init.d/下就可以
#!/bin/bash
##############################################
#date:2018-06-19
#blog www.abcdocker.com######################
## SS ####################
source /etc/profile && . /etc/init.d/functions

stop(){
    sed -i 's#export http_proxy=http://127.0.0.1:8118##g' /etc/profile &&
    sed -i 's#export https_proxy=http://127.0.0.1:8118##g' /etc/profile
    if [ $? -eq 0 ];then
            action "/etc/profile is stop" /bin/true
    else
            action "/etc/profile is error" /bin/false
    fi
    sleep 3

    `ps -ef |grep "privoxy" |grep -v "grep" |awk '{print $2}'|xargs kill -9 &>/dev/null`
    if [ $? -eq 0 ];then
            action "privoxy is stop" /bin/true
    else
            action "privoxy is error" /bin/false
    fi


    `ps -ef |grep "shadowsocks" |grep -v "grep" |awk '{print $2}'|xargs kill -9 &>/dev/null`
    if [ $? -eq 0 ];then
            action "shadowsocks is stop" /bin/true
    else
            action "shadowsocks is error" /bin/false
    fi
    unset http_proxy
    unset https_proxy
    source /etc/profile
}


start(){
    echo "export http_proxy=http://127.0.0.1:8118" >>/etc/profile
    echo "export https_proxy=http://127.0.0.1:8118" >>/etc/profile
    source /etc/profile
    source /etc/profile
    if [ $? -eq 0 ];then
            action "/etc/profile is start" /bin/true
    else
            action "/etc/profile is error" /bin/false
    fi


    systemctl restart privoxy
    if [ $? -eq 0 ];then
            action "privoxy is start" /bin/true
    else
            action "privoxy is error" /bin/false
    fi


    systemctl start shadowsocks
    if [ $? -eq 0 ];then
            action "shadowsocks is stop" /bin/true
    else
            action "shadowsocks is error" /bin/false
    fi
}

case "$1" in
start)
    start
;;
stop)
    stop
;;
restart)
    stop
    start
    source /etc/profile
    source /etc/profile
    source /etc/profile
;;
*)
    echo "Please input [start|stop] thanks"
;;
esac
参考链接:


forward-socks5t / 127.0.0.1:1080 .
哥们儿,你最后面丢了个点
这后面没有点吧
Shadowsocks 阿里云的云服务器封杀了这个,装了也访问不了谷歌
SS买海外节点配置就ok
[root@localhost /root 14:15:50 4.2 ]# systemctl enable shadowsocks
Failed to execute operation: No such file or directory
这不是报错很明显吗
centos7的启动目录不是在/etc/init.d/下,所以不能使用systemctl。 使用/etc/init.d/的脚本就可以,这脚本是自己写的
[root@localhost /root 14:22:24 4.2 ]# systemctl enable shadowsocks
Failed to execute operation: No such file or directory
看上面啊 >>3.配置自启动